How to run CubeBackup for Google Workspace on a Mac.
CubeBackup is designed to run on Windows and Linux systems. If you want to run CubeBackup for Google Workspace on a Mac machine, you can:
- Run CubeBackup on a VM on your Mac.
- Run CubeBackup in a docker container on your Mac.
Installation Instructions using Docker Desktop
Experienced Docker users can easily pull the CubeBackup for Google Workspace image cubebackup/workspace to a local repository, start the CubeBackup container, and follow the step-by-step setup guide to complete the initial configuration.
For users who are not familiar with Docker, Docker Desktop offers an easy-to-install solution to run CubeBackup on a Mac. Please follow the instructions below to create a containerized CubeBackup instance to backup your Google Workspace data:
NOTE: Deploying CubeBackup on a Mac using Docker Desktop is not as stable as on a Windows or Linux server. Please proceed at your own risk.
- Download the Docker Desktop for Mac installation package.
- Double click the DMG file and follow the prompts to install it on your computer.
- Open the application and wait for the docker engine to start.
Next you will need to pull the CubeBackup image to your local repository. Open a command-line Terminal window, and run the following command:
docker pull cubebackup/workspace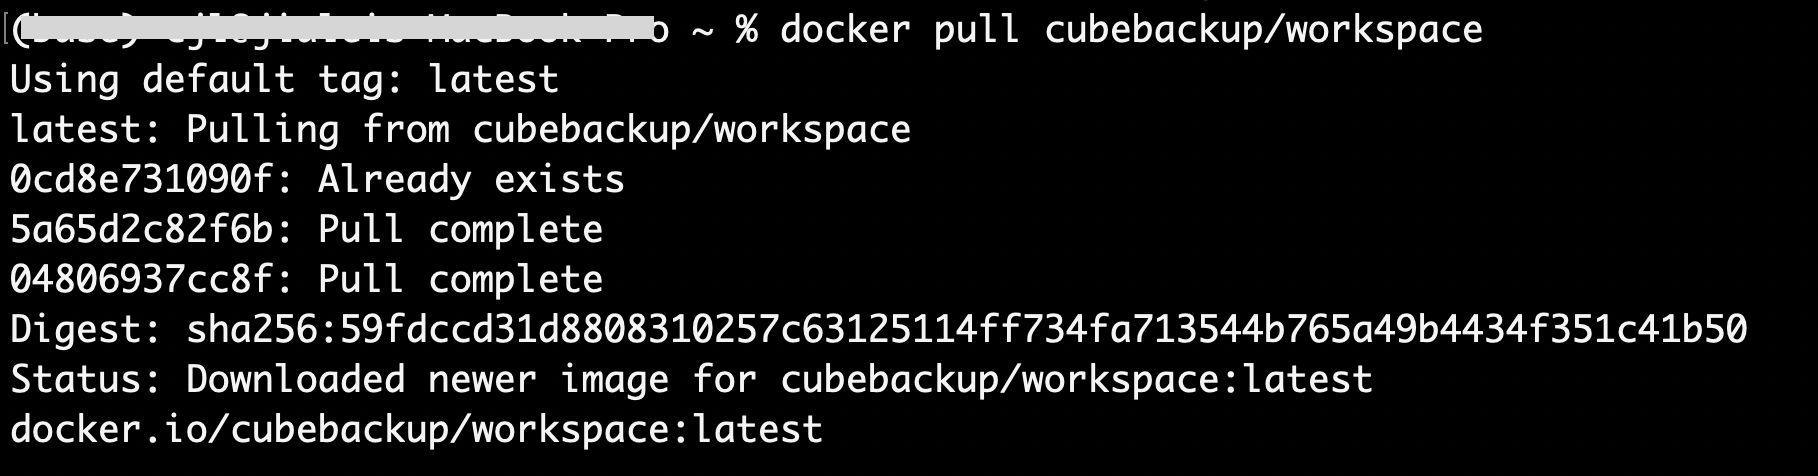
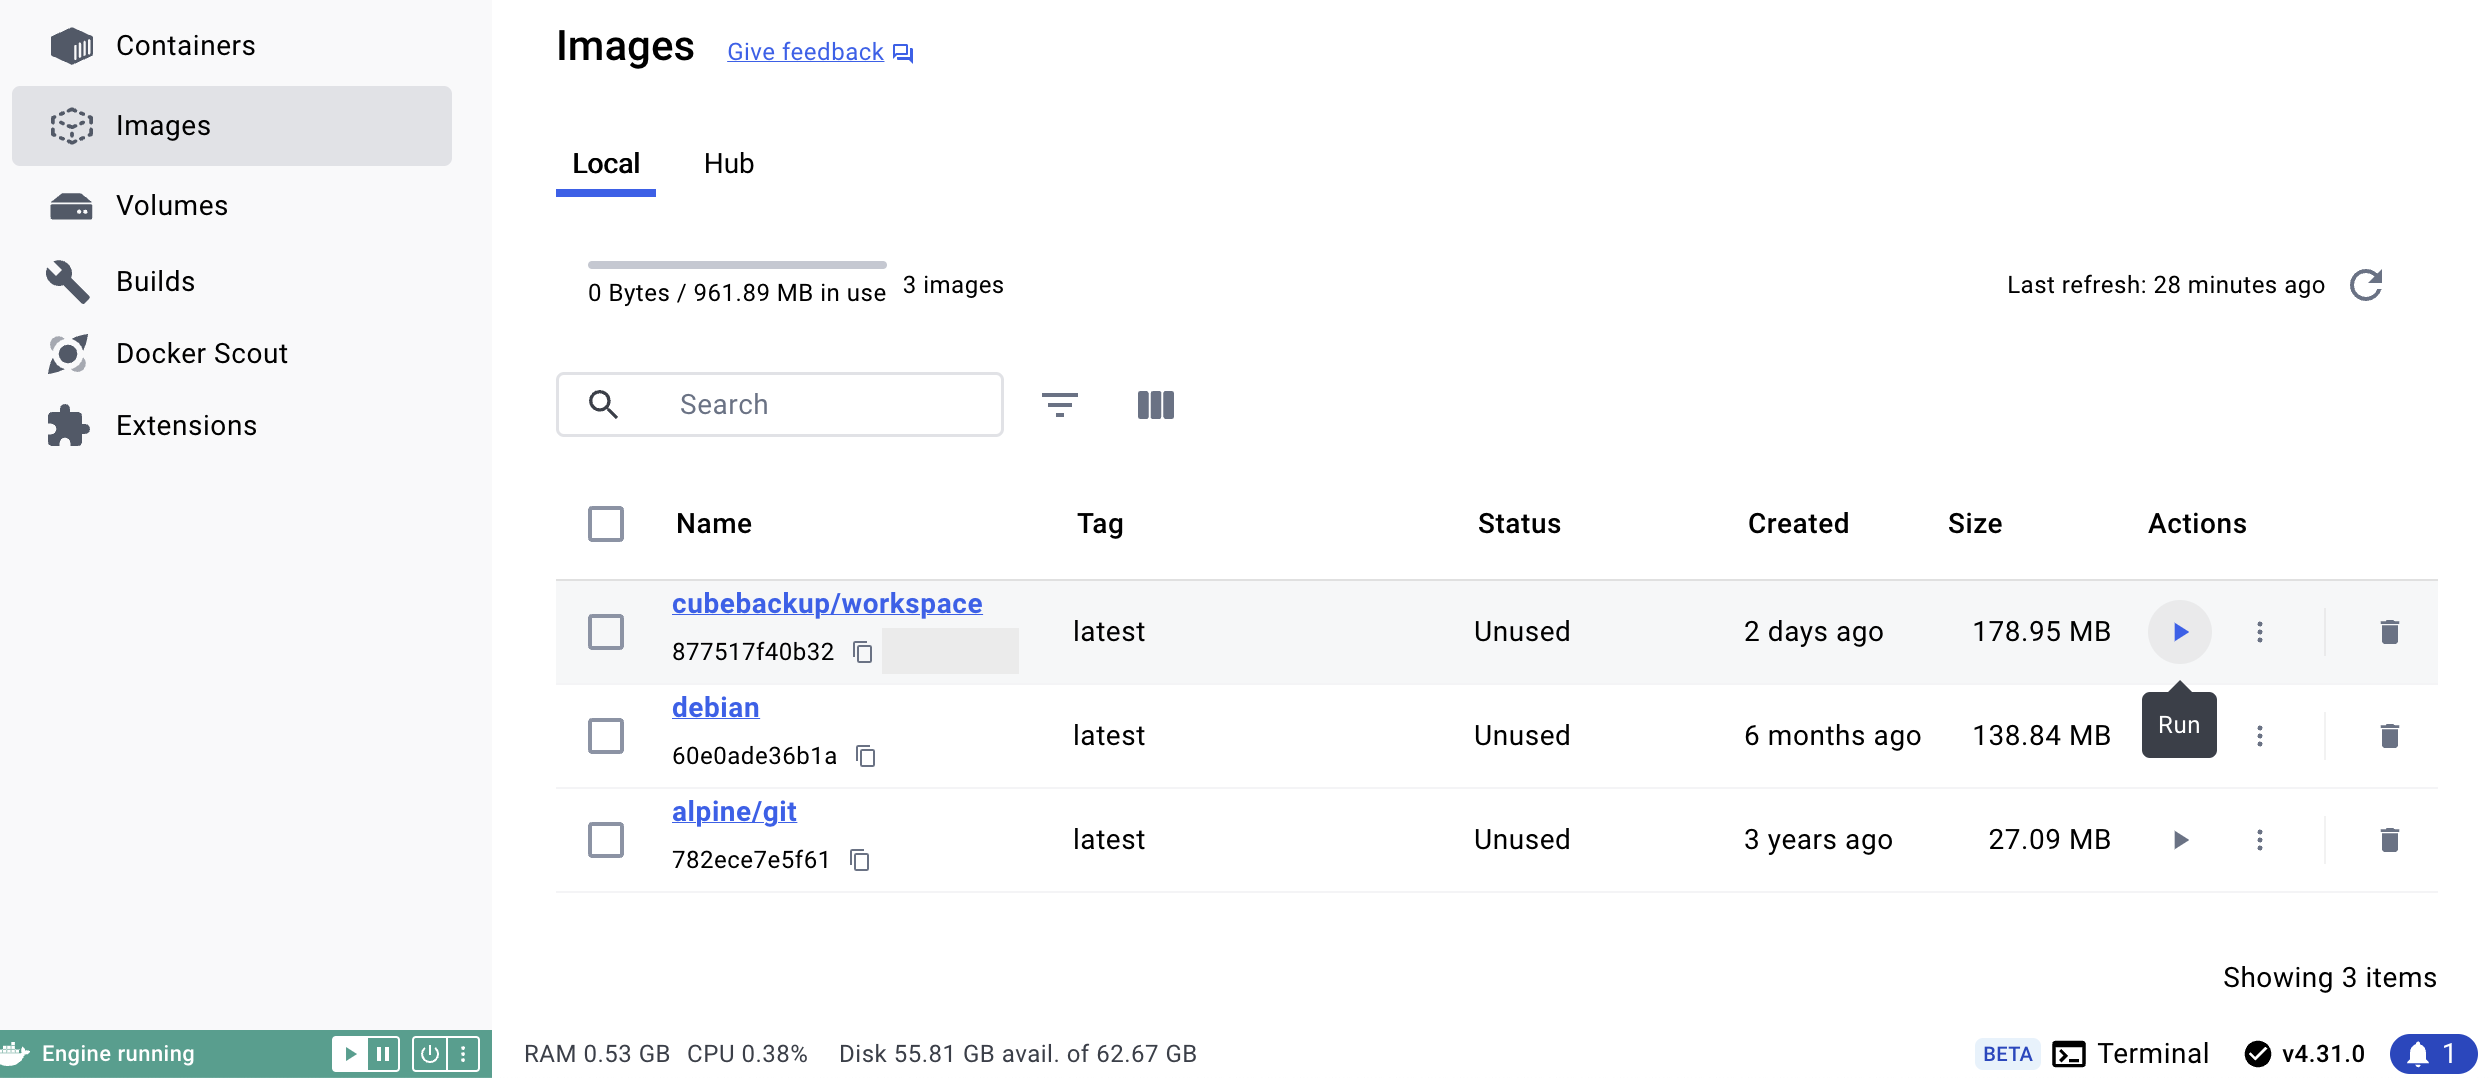
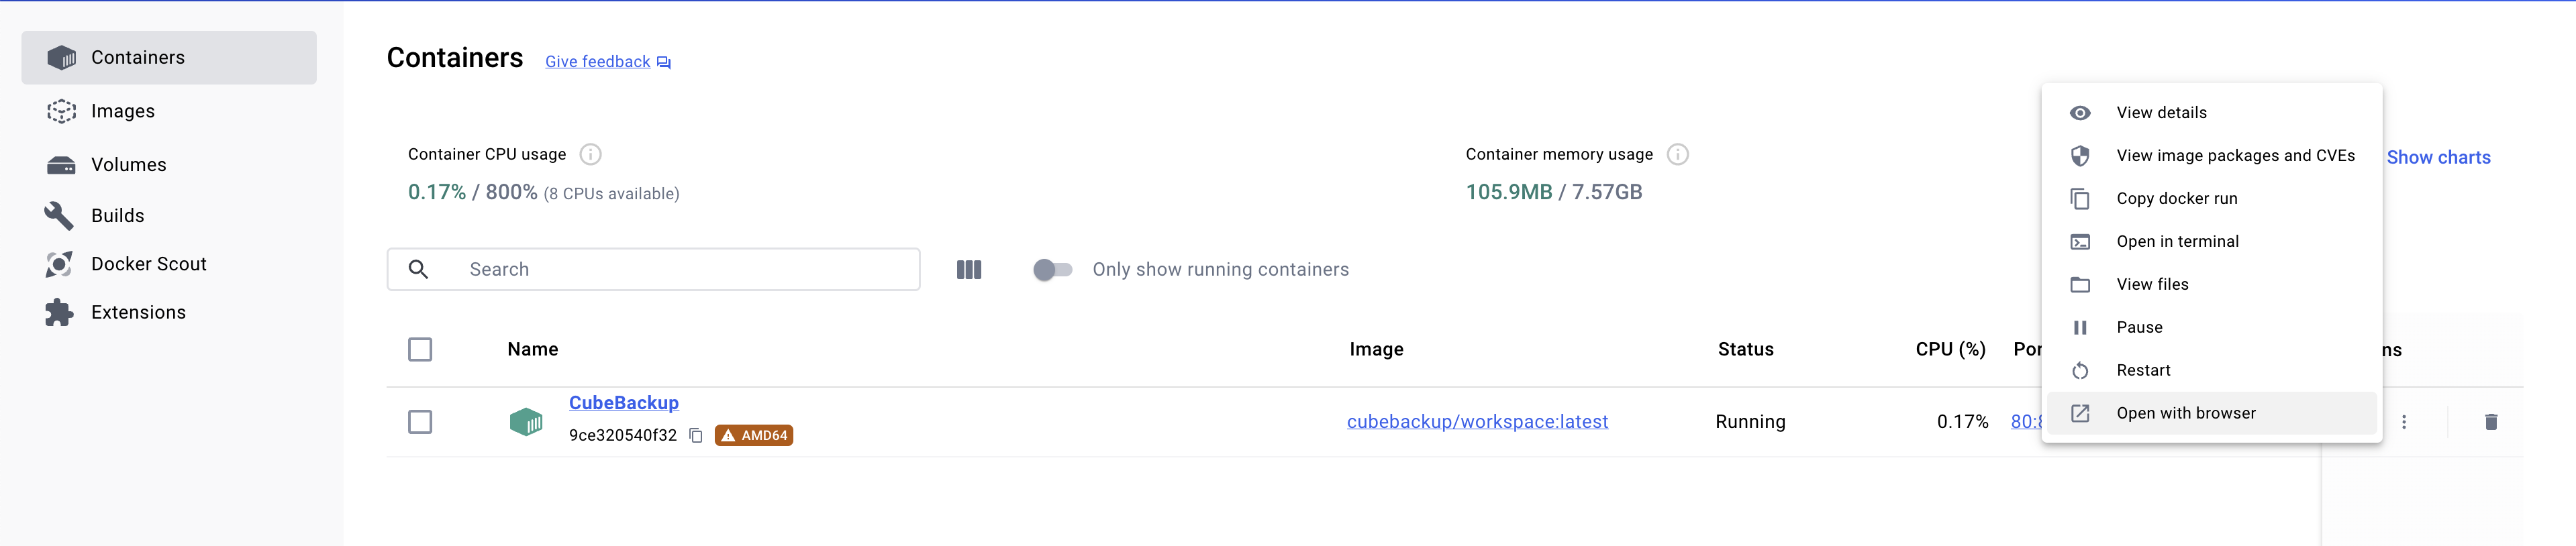
Open the Docker Desktop and select Images from the left panel to verify that the cubebackup/workspace image has been successfully added. Hover over the entry and Click Run.
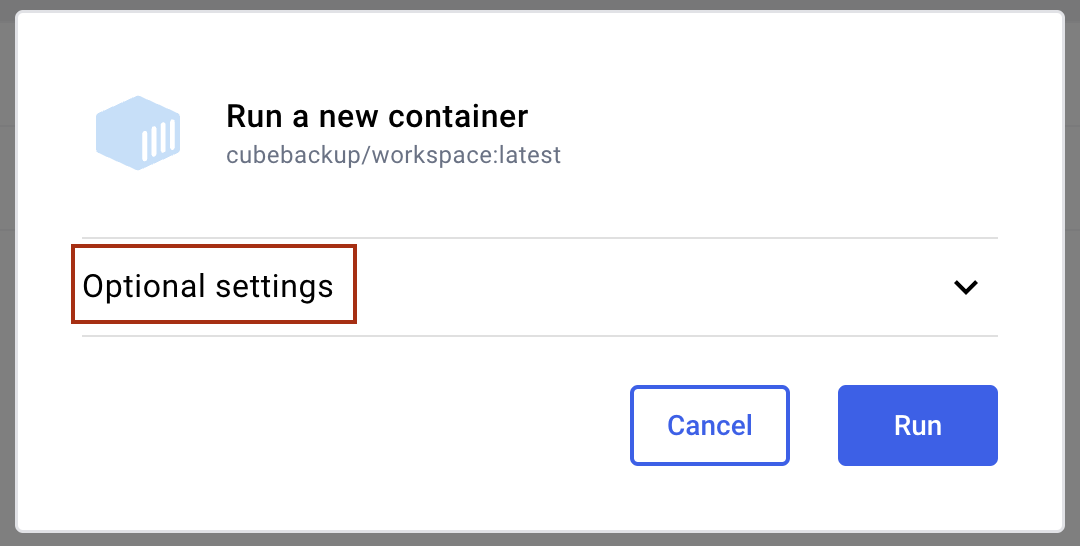
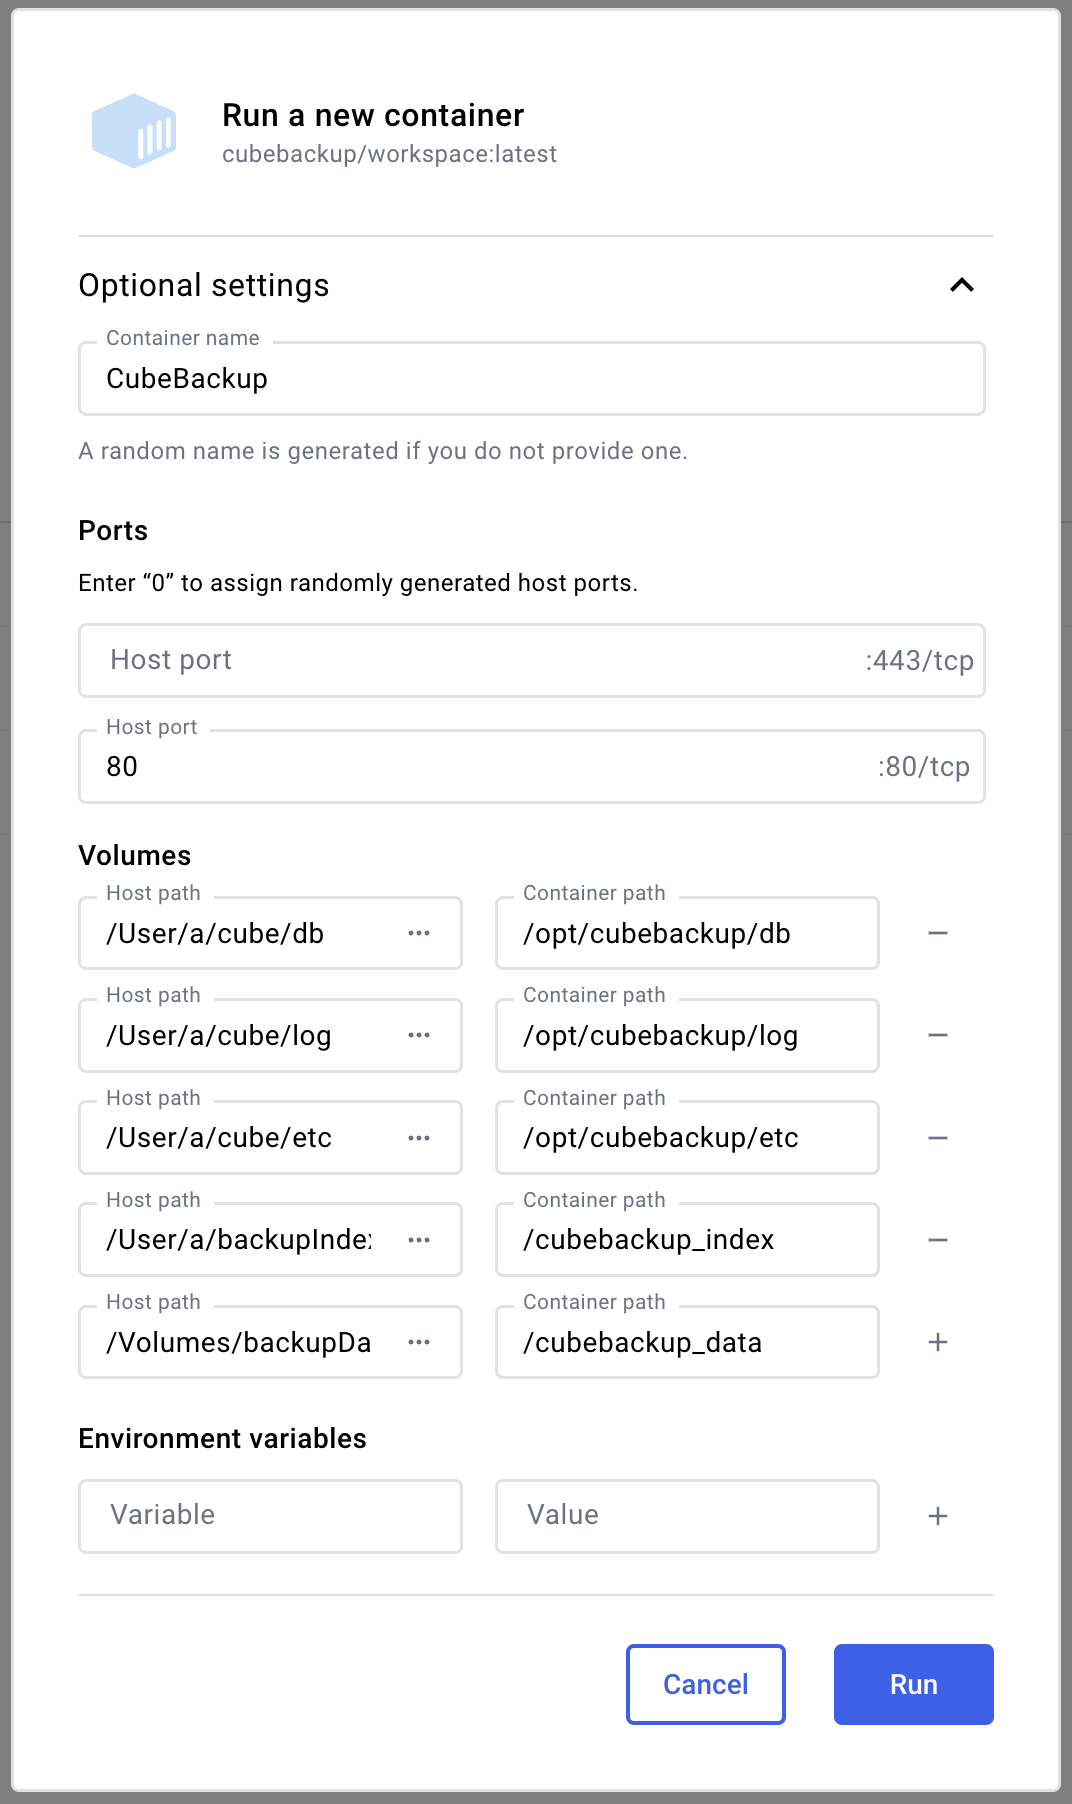
Click Optional settings in the prompt window to display the advanced settings. Backing up to on-premises or cloud storage should use different settings. Please click the corresponding tab below to configure your container.
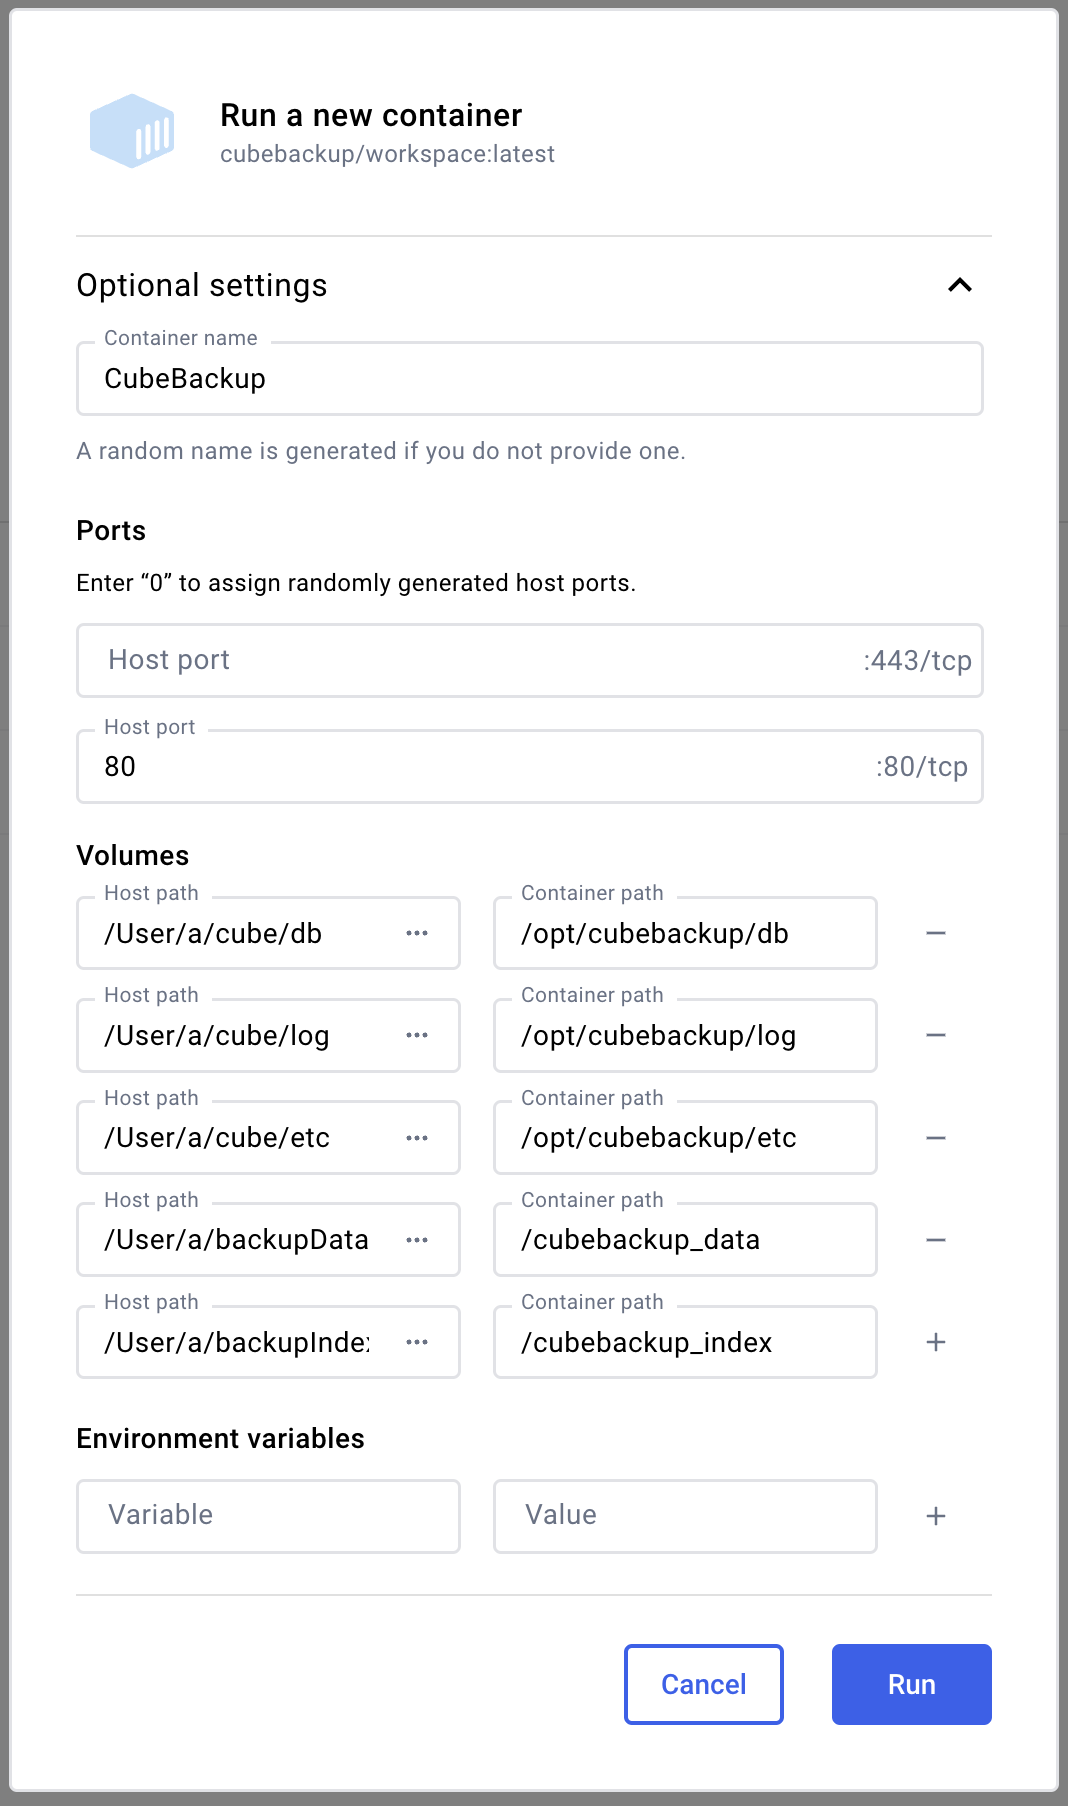
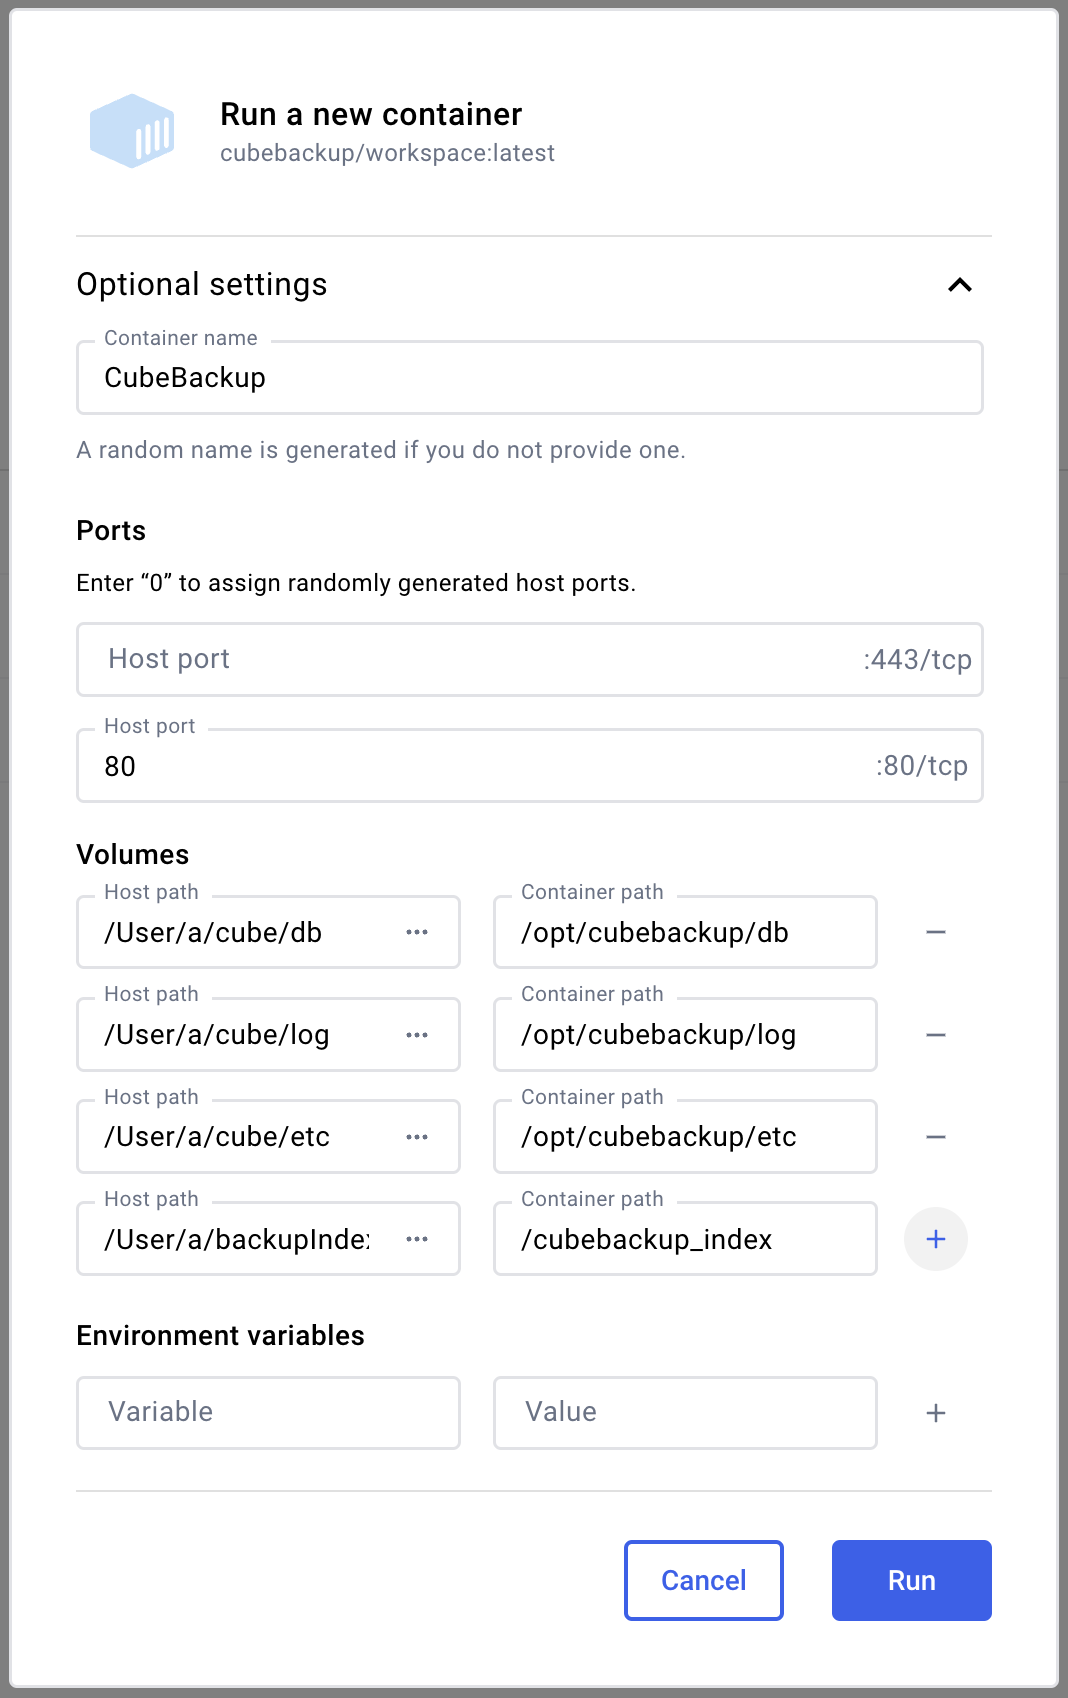
- Enter a Container name (e.g. CubeBackup).
- In the Ports section, enter
80in the textbox in front of the corresponding Container Port80/tcp. If the port is already in use, you can select another one (e.g. 8080) for the CubeBackup web console. - In the Volumes section, create five pairs of directories. We have example directories for the Host Paths, but these can be changed depending on your particular needs. The Container Paths, however, must be created exactly as listed here:
- Before clicking Run, upload this config.toml file into the
/Users/a/cube/etcdirectory. - Click Run and switch to Containers in the left panel. You should now see the CubeBackup container listed.
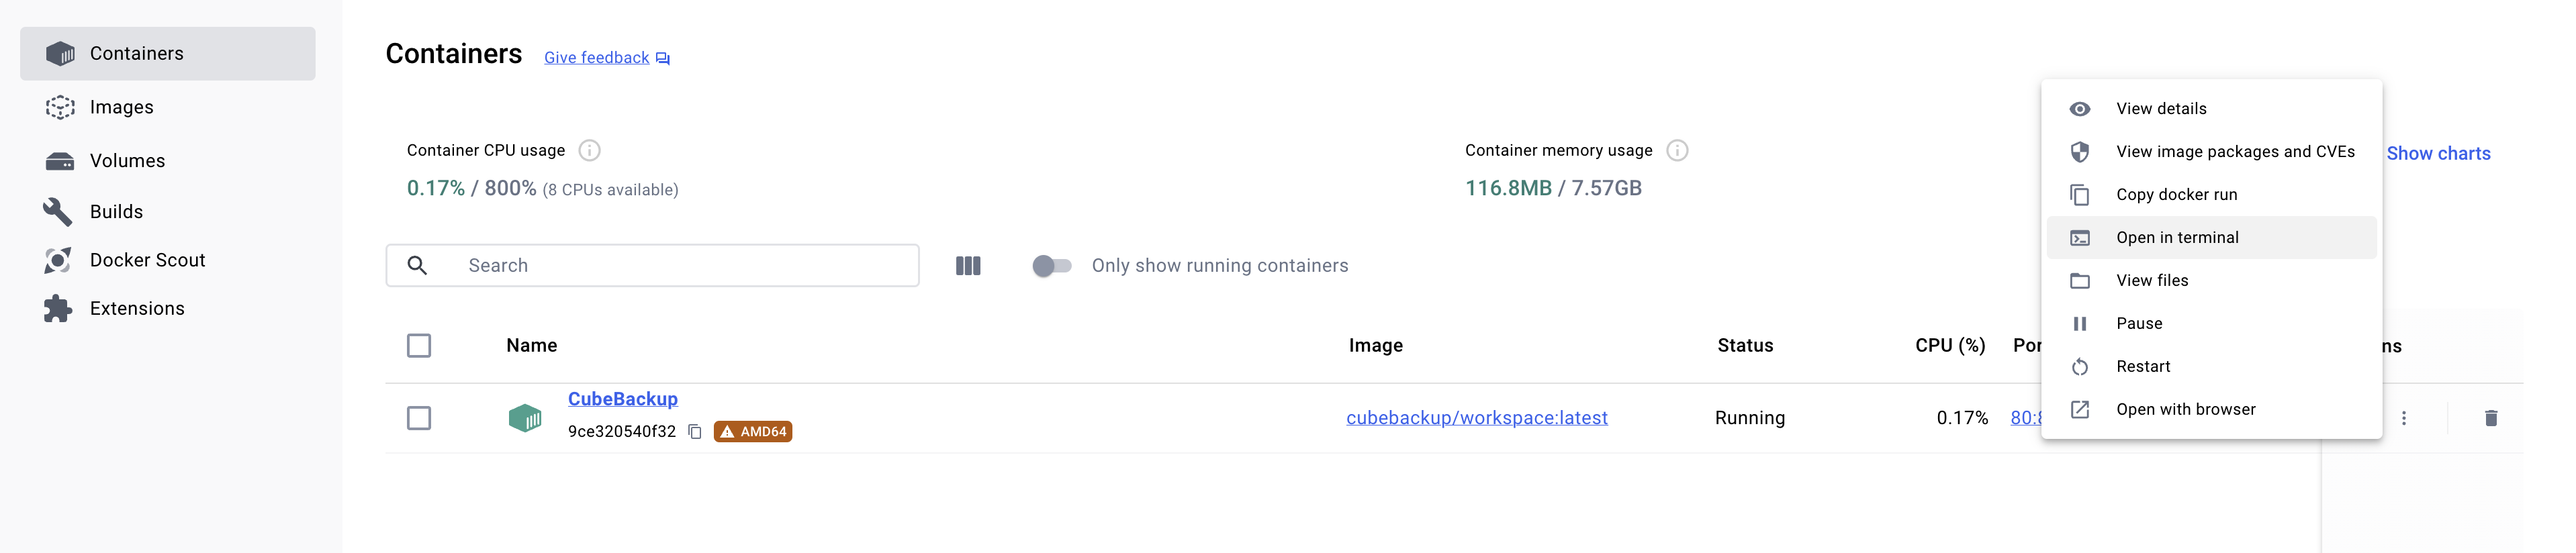
- Click ⋮ under Actions and select Open with browser to open the initial setup wizard.
- Please follow the step-by-step instructions to configure CubeBackup.
- To open the CubeBackup web console in the future, you can either click the same link in Docker Desktop, or visit http://127.0.0.1 directly in a web browser. If you changed port 80 to a different port in Step 8, please add the port number to the end of the URL (e.g. http://127.0.0.1:8080).
| Host Path | Container Path | |
|---|---|---|
/Users/a/cube/db |
/opt/cubebackup/db |
storage configuration directory |
/Users/a/cube/log |
/opt/cubebackup/log |
CubeBackup log directory |
/Users/a/cube/etc |
/opt/cubebackup/etc |
CubeBackup configuration directory |
/Users/a/backupIndex |
/cubebackup_index |
backup data index directory |
/Users/a/backupData |
/cubebackup_data |
backup storage directory |
NOTE:The CubeBackup container can now access the backup storage location and the data index location directly using /cubebackup_data and /cubebackup_index. Later, when you run the CubeBackup setup wizard, please ensure that the Backup path points to /cubebackup_data and the Data Index path points to /cubebackup_index.
- Enter a Container name (e.g. CubeBackup).
- In the Ports section, enter
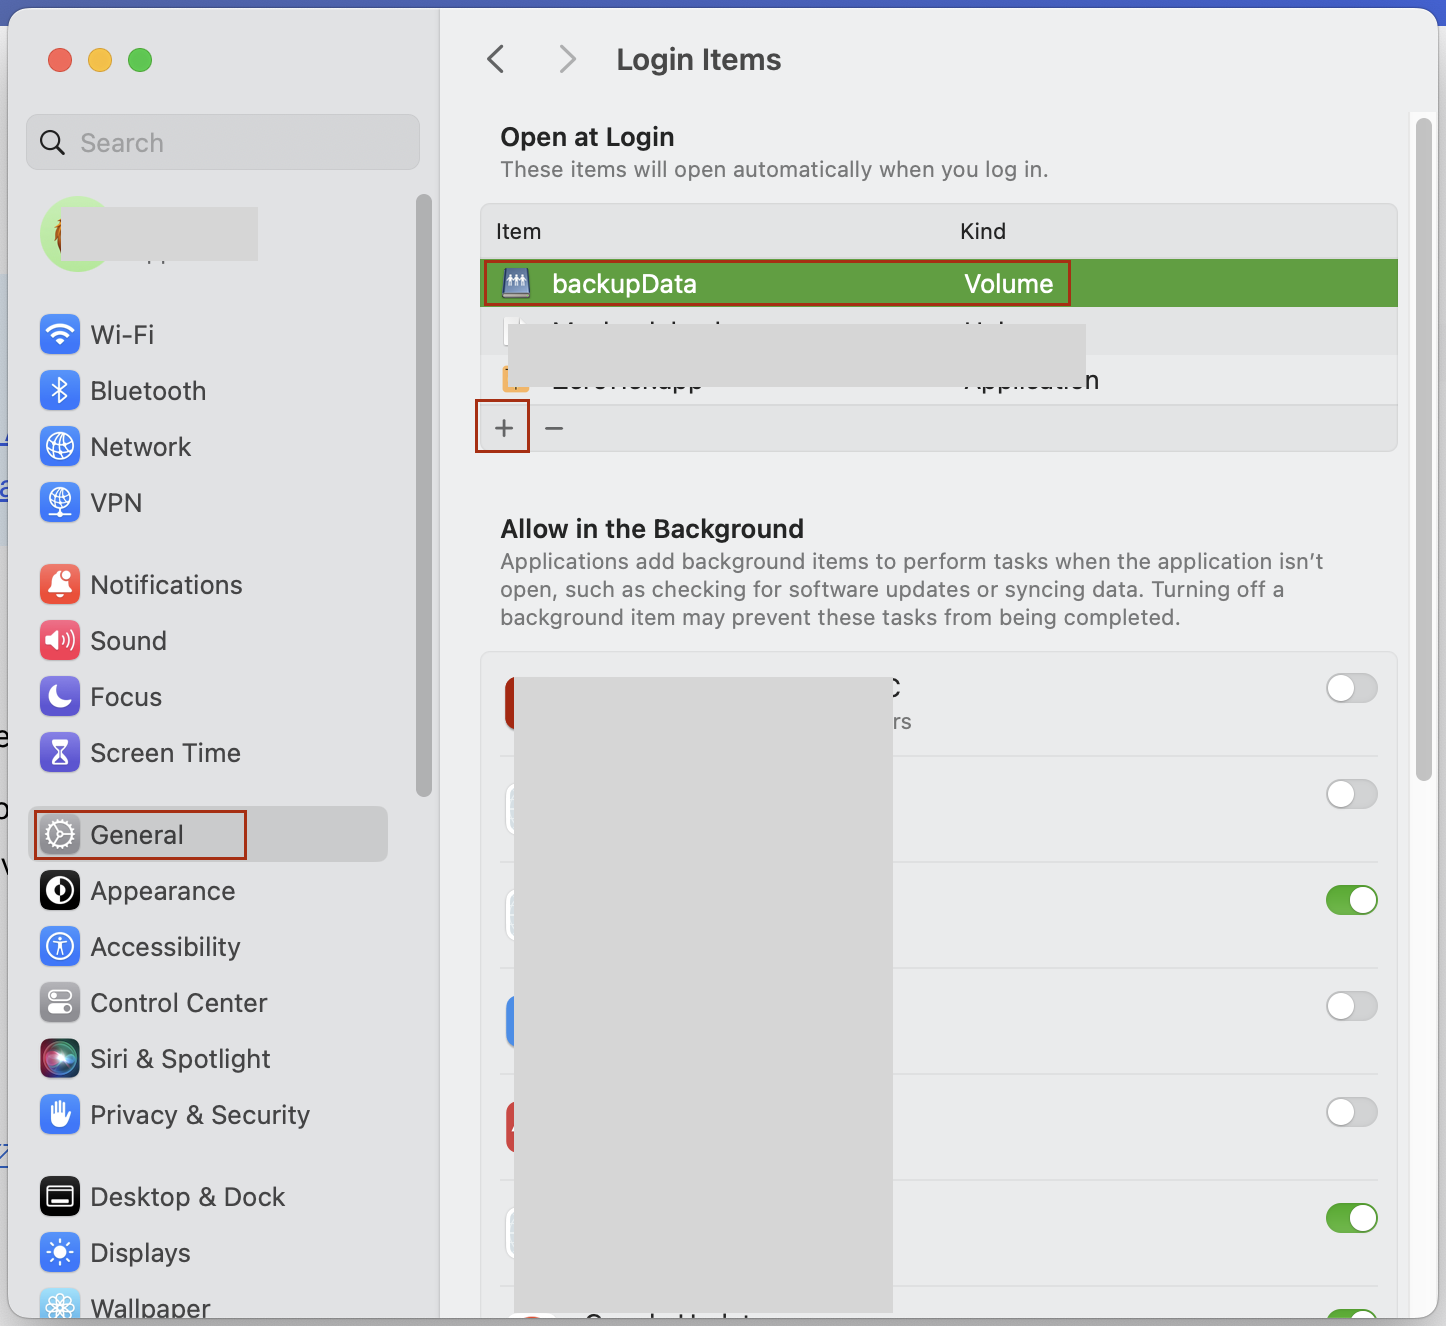
80in the textbox in front of the corresponding Container Port80/tcp. If the port is already in use, you can select another one (e.g. 8080) for the CubeBackup web console. - Your NAS drive or other network storage must be mounted before continuing. Open the System Settings > General on your Mac, then click the Login Items section.
- Then click + at the bottom and follow the prompts to add the backup storage volume. For example, you can add a new directory backupData on the NAS to the login items.
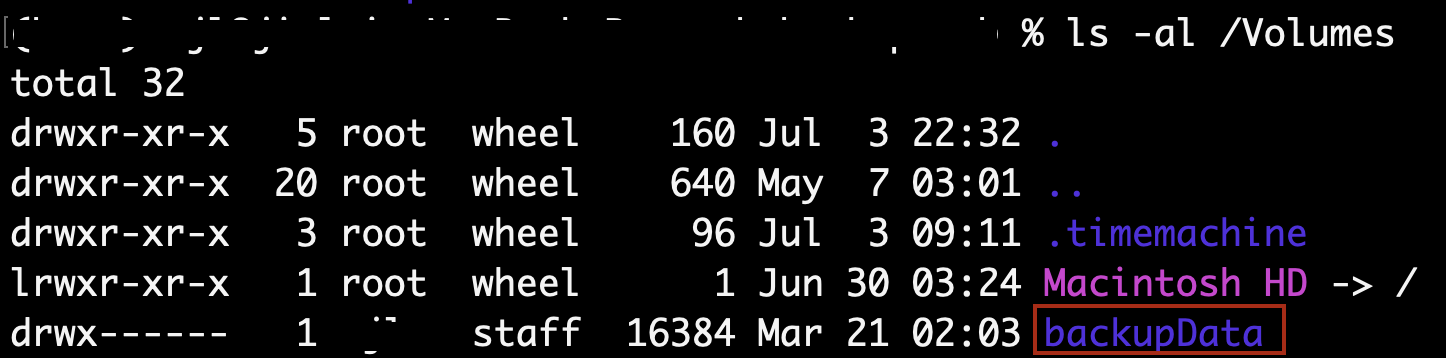
- Open the Terminal on your Mac and run the following command to confirm that the volume is successfully mounted.
ls -al /Volumes/
- If your NAS is displayed in the /Volumes directory, you can return to Docker Desktop. In the Volumes section, create five pairs of directories. We have example directories for the Host Paths, but these can be changed depending on your particular needs. The Container Paths, however, must be created exactly as listed here:
- Before clicking Run, upload this config.toml file into the
/Users/a/cube/etcdirectory. - Click Run and switch to Containers in the left panel. You should now see the CubeBackup container listed.
- Click ⋮ under Actions and select Open with browser to open the initial setup wizard.
- Please follow the step-by-step instructions to configure CubeBackup.
- To open the CubeBackup web console in the future, you can either click the same link in Docker Desktop, or visit http://127.0.0.1 directly in a web browser. If you changed port 80 to a different port in Step 8, please add the port number to the end of the URL (e.g. http://127.0.0.1:8080).
| Host Path | Container Path | |
|---|---|---|
/Users/a/cube/db |
/opt/cubebackup/db |
storage configuration directory |
/Users/a/cube/log |
/opt/cubebackup/log |
CubeBackup log directory |
/Users/a/cube/etc |
/opt/cubebackup/etc |
CubeBackup configuration directory |
/Users/a/backupIndex |
/cubebackup_index |
backup data index directory |
/Volumes/backupData |
/cubebackup_data |
backup storage directory |
NOTE:The CubeBackup container can now access the backup storage location and the data index location directly using /cubebackup_data and /cubebackup_index. Later, when you run the CubeBackup setup wizard, please ensure that the Backup path points to /cubebackup_data and the Data Index path points to /cubebackup_index.
- Enter a Container name (e.g. CubeBackup).
- In the Ports section, enter
80in the textbox in front of the corresponding Container Port80/tcp. If the port is already in use, you can select another one (e.g. 8080) for the CubeBackup web console. - In the Volumes section, create four pairs of directories. We have example directories for the Host Paths, but these can be changed depending on your particular needs. The Container Paths, however, must be created exactly as listed here:
- Before clicking Run, upload this config.toml file into the
/Users/a/cube/etcdirectory. - Click Run and switch to Containers in the left panel. You should now see the CubeBackup container listed.
- Click ⋮ under Actions and select Open with browser to open the initial setup wizard.
- Please follow the step-by-step instructions to configure CubeBackup.
- To open the CubeBackup web console in the future, you can either click the same link in Docker Desktop, or visit http://127.0.0.1 directly in a web browser. If you changed port 80 to a different port in Step 8, please add the port number to the end of the URL (e.g. http://127.0.0.1:8080).
| Host Path | Container Path | |
|---|---|---|
/Users/a/cube/db |
/opt/cubebackup/db |
storage configuration directory |
/Users/a/cube/log |
/opt/cubebackup/log |
CubeBackup log directory |
/Users/a/cube/etc |
/opt/cubebackup/etc |
CubeBackup configuration directory |
/Users/a/backupIndex |
/cubebackup_index |
backup data index directory |
NOTE:The CubeBackup container can now access the data index location directly using /cubebackup_index. Later, when you run the CubeBackup setup wizard, please ensure that the Data Index path points to /cubebackup_index.
Manage you CubeBackup container using Docker Desktop
We strongly recommend that you make a copy of the encryption key file and store it in a separate safe location. You can either find it at /opt/cubebackup/db/keys.json inside the docker container or from the mounted volume on the Mac (e.g. /Users/a/cube/db/keys.json).
Please note that if the key file is lost, your encrypted backup data will be completely unrecoverable. CubeBackup Inc. does not have access to any key files and will be unable to help you!
The installation directory of CubeBackup can be accessed directly in the docker container using CLI, which you can open by clicking the Open in terminal link.
CubeBackup is designed to run continuously on a backup server. Please try not to interrupt the network connection especially during the initial backup, which may take several days to complete.
If it's impossible to keep the network connection alive or if the computer is shut down frequently, please consider restricting the backup tasks to appropriate hours to avoid forced quitting and other unexpected errors by using CubeBackup's throttling options.